A Step-by-Step Guide to Installing Pebble Mosaic Tiles for a Flawless, Natural Look
There's something uniquely captivating about the organic texture and timeless beauty of a natural stone surface. It connects us to the earth, creating a sense of calm and serenity that manufactured materials can rarely replicate. A Pebble Mosaic is the perfect embodiment of this principle, transforming ordinary floors, walls, and backsplashes into stunning, nature-inspired features.
Whether you're designing a spa-like bathroom retreat, a rustic kitchen backsplash, or a textured accent wall, interlocking Stone Pebble Mosaic tiles offer a straightforward path to achieving a high-end, custom look. As a trusted name among pebble mosaic suppliers in India, Jagson India provides materials that are both beautiful and easy to work with. The magic lies in their design: individual, hand-picked pebbles are mounted onto a flexible mesh backing, allowing you to cover large areas with what appears to be a seamlessly hand-laid stone surface.
This guide is designed to empower both passionate DIY enthusiasts and seasoned contractors with the knowledge and confidence to execute a perfect installation. We'll walk you through every stage, from meticulous preparation to the final seal, ensuring your project results in a durable, breathtaking finish that will be enjoyed for years to come. We will cover installations for both traditional round pebbles and the sleek, flat-surfaced Sliced Pebble Mosaic tiles.
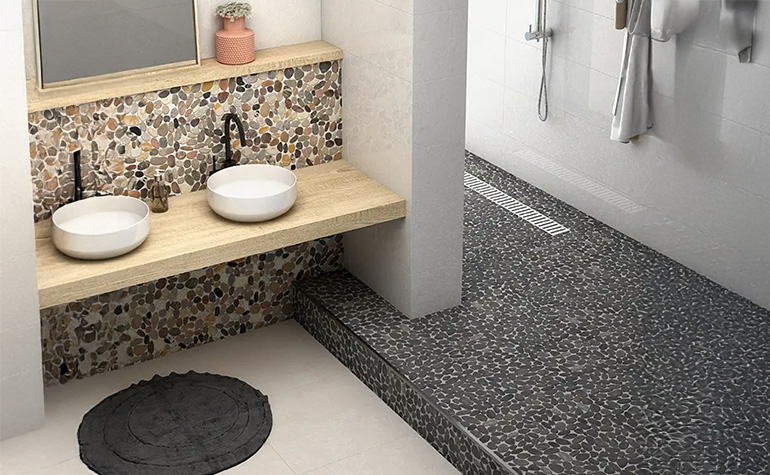
Create a personal oasis with the timeless beauty of a natural Pebble Mosaic floor and wall.
Why Choose a Pebble Mosaic?
Before we grab the trowel, let's talk about why these stone mosaics, particularly the kind of natural pebble mosaic India is famous for, are such a compelling choice for modern design.
- Unmatched Aesthetic Appeal: The primary draw is their natural beauty. Each pebble has a unique color, shape, and texture, creating a surface that is rich with visual interest and character. It’s a direct way to bring the elegance of the outdoors inside.
- A Unique Tactile Experience: Especially for shower floors, the gentle massage of the smooth stones underfoot is a luxurious, spa-like experience that simply can't be matched by flat tile.
- Incredible Durability: Sourced from nature, these are real stones. When installed and sealed correctly, they are incredibly durable, resistant to wear and tear, and can easily last a lifetime.
-
Versatility in Design: The applications are nearly limitless. Pebble mosaics are perfect for:
- Shower floors and walls
- Bathroom floors
- Kitchen backsplashes (using pebble mosaic wall tiles India loves for their unique look)
- Fireplace surrounds
- Water features and pools
- Outdoor patios and garden pathways
- The Seamless Look: Thanks to the interlocking mesh backing, the tile sheets fit together like puzzle pieces, making the seams between them virtually disappear. This creates the illusion of a continuous surface of individually laid stones—a look that was once only achievable by specialist artisans.
Pre-Installation: Planning & Preparation for Success
A professional finish is 90% preparation. Rushing this stage is the most common mistake. By taking your time here, you set the foundation for a smooth and successful installation. As one of the premier pebble mosaic exporters in India, we cannot stress this enough: preparation is everything.
Step 1: Calculate Your Square Footage Accurately
Measure the length and width of the area you plan to tile and multiply them to get the total square footage (or square meters).
Length (ft) x Width (ft) = Total Square Footage
Once you have your total, add 10-15% to this number. This extra amount is crucial to account for cuts, mistakes, and any small custom fitting you might need to do. It’s far better to have a few extra sheets left over than to run out mid-project.
Step 2: Gather Your Tools & Materials
Having everything on hand before you start prevents frustrating interruptions. Here is a comprehensive checklist:
Tools:
- Tape Measure
- Level
- Notched Trowel (1/4" or 6mm square-notch is a good starting point)
- Utility Knife with extra blades
- Rubber Grout Float
- Two 5-gallon (20-liter) Buckets (one for mixing, one for rinsing)
- Large Sponges (specifically for grout)
- Drill with a mixing paddle attachment (optional, but highly recommended for mixing mortar/grout)
- Tile Wet Saw or a Hand Grinder with a diamond blade (for cutting individual pebbles)
Materials:
- Pebble stone mosaic tiles
- Thin-Set Mortar: A high-quality, polymer-modified thin-set is essential for its strong bond and flexibility. For wet areas, choose a product rated for that use.
- Grout: For the wider joints in a pebble mosaic, sanded grout is the best choice for its strength and durability.
- Grout & Stone Sealer: A high-quality penetrating (impregnating) sealer is non-negotiable. This protects the natural stone and the grout from water penetration and staining.
- Waterproofing Membrane: (For wet areas like showers) A liquid-applied or sheet membrane is critical to protect your walls and subfloor from water damage.
- Backer Board: Cement backer board (like HardieBacker or Durock) for walls and floors in wet areas. Do not apply tile directly to drywall in a shower.
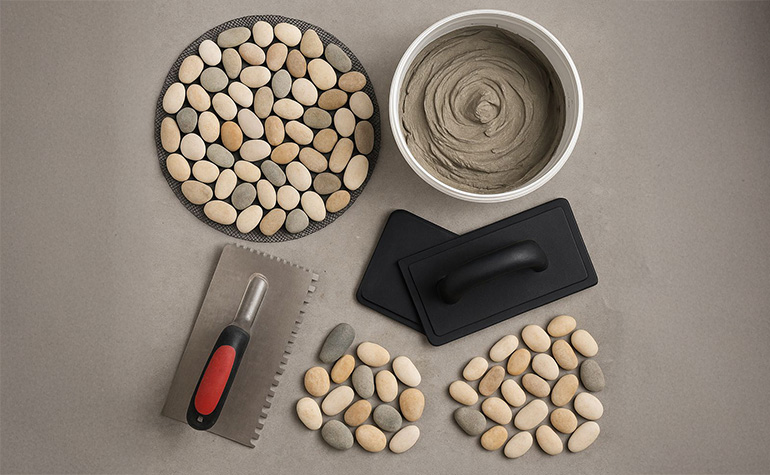
The right tools for the job. Gather everything you need before you start for a smooth, professional installation.
Step 3: Prepare Your Surface (The Most Critical Step)
Your pebble tile is only as good as the surface it's on. The substrate must be:
- Clean: Free of dust, grease, paint, or any debris that could interfere with the mortar's bond.
- Level & Flat: Use a level to check the surface. Fill any low spots with a leveling compound and grind down any high spots.
- Structurally Sound: The surface must be solid, with no flexing or movement.
For Wet Areas (Showers, etc.): This step is not optional. You must create a waterproof "box" for the water to sit in. After installing your cement backer board, apply a waterproofing membrane over the entire surface, following the manufacturer's instructions precisely. This includes walls and floors.
Step 4: The Dry Layout
Before you mix a single drop of mortar, lay out your tile sheets on the floor.
- Start in a corner and lay down your first sheet.
- Take the next sheet and interlock its edge with the first one. You'll see how the staggered pebbles on the edge are designed to fit together.
- Continue this across the entire surface. Rotate the sheets as you go to ensure the patterns are randomized and you don't see any repeating "stamps."
- This dry run allows you to identify where you'll need to make cuts and ensures you have a solid plan. It’s the single best way to guarantee you won't see the seams in your final installation.

Pro Tip: A dry layout helps you perfect the pattern and plan your cuts before you commit with mortar.
The Installation Process: A Step-by-Step Guide
With your planning complete, it's time for the exciting part. Remember to work in small, manageable sections (e.g., 3x3 ft or 1 sq. meter at a time) so the mortar doesn't dry out before you can set the tiles.
Step 5: Mix and Apply the Thin-Set Mortar
Follow the instructions on the bag to mix your thin-set mortar. Add the powder to the water (not the other way around) and mix until it reaches a smooth, peanut butter-like consistency. Let it "slake" (rest) for 5-10 minutes, then give it a final mix.
- Scoop some mortar onto your surface.
- Using the flat side of your trowel, spread a thin, smooth layer over your working area.
- Switch to the notched side of the trowel. Holding it at a 45-degree angle, comb the mortar to create uniform ridges. This ensures an even bed of adhesive for the tiles.
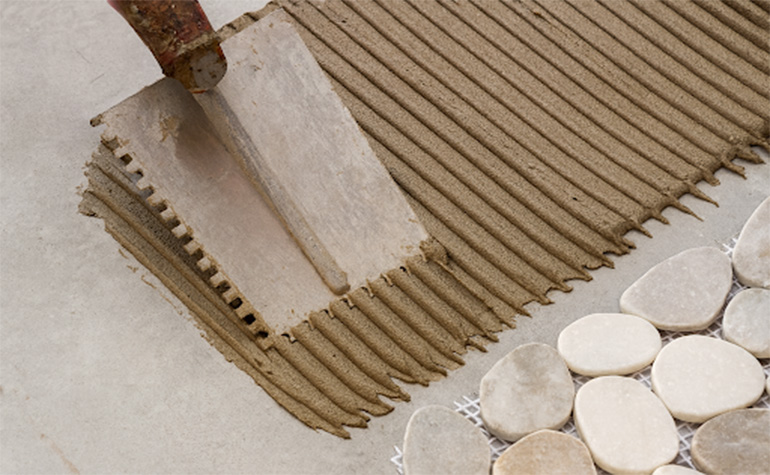
Create an even bed of adhesive by combing the thin-set mortar with the notched side of your trowel.
Step 6: Set the Pebble Mosaic Tiles
- Carefully place your first sheet onto the combed mortar, aligning it with your starting lines.
- Press down firmly and evenly across the entire sheet.
- To ensure the pebbles are set to the same depth, take a small, flat piece of wood (or a grout float) and gently tap all over the surface. This is called "beating in" the tile and is crucial for an even finish, especially for Sliced Pebble Mosaic where you want a perfectly flat floor. The same technique applies to all forms of natural pebble stone mosaic.
- Place your next sheet, interlocking it tightly with the first. Check carefully to ensure the seam is invisible. Beat it in as well.
- For edges and corners, you can easily cut the mesh backing with a utility knife to fit the sheets.
Step 7: Custom Fitting (The Professional Touch)
As you approach a wall or obstacle, you may be left with a small, awkward gap. Don't just fill this with grout. For a truly professional look, pop a few individual pebbles off a spare sheet and set them into the gaps by hand. This small detail makes a world of difference and is a hallmark of quality craftsmanship.
Step 8: Let it Cure
Patience is a virtue. Once all the tiles are set, you must let the thin-set mortar cure completely. Do not walk on it or disturb it in any way. Refer to the mortar bag for the recommended curing time, which is typically 24 to 48 hours.
Grouting and Sealing: The Finishing Touches
This final stage is what brings the entire project to life, filling the gaps and protecting your beautiful new surface.
Step 9: Mix and Apply the Grout
Choose a grout color that complements your marble pebbles. A contrasting color will make each pebble pop, while a matching color will create a more uniform, blended look.
Mix the sanded grout according to the package directions until it's a smooth, consistent paste. Using your rubber grout float, push the grout into the joints between the pebbles.
- Hold the float at a 45-degree angle and sweep it diagonally across the tiles.
- Work from multiple directions to ensure every single gap, deep and shallow, is completely filled.
- Use the edge of the float to scrape off as much excess grout as possible from the surface of the pebbles.

Work the grout into all the joints from multiple angles to ensure complete, void-free coverage.
Step 10: The Critical Clean-Up
This is the most technique-sensitive part of the process. Timing is everything.
- Let the grout set for about 15-30 minutes. It should be firm to the touch but not fully hard.
- Fill a bucket with clean water. Take your grout sponge, dip it in the water, and wring it out until it is just damp, not dripping wet.
- In a light, single-direction pass, gently wipe the sponge across the surface of the pebbles to remove the excess grout.
- Rinse your sponge in the bucket after every single pass. Using a dirty sponge will just smear grout haze everywhere.
- The goal is to clean the tops of the stones without pulling the grout out from the joints. Be gentle and patient. After the initial clean, let it dry for a few hours. A slight haze may form, which can be buffed off with a clean, dry cloth or microfiber towel.
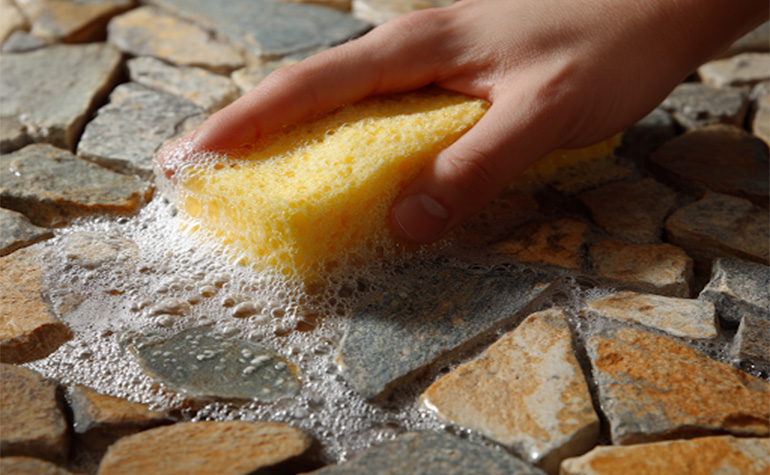
Patience is key. Use a clean, damp sponge and gentle strokes to carefully reveal the natural beauty of the stones.
Step 11: Seal, Seal, Seal!
Natural stone is porous. Sealing is not optional—it's essential for protecting your investment from water damage, stains, and mold.
- Wait for the grout to cure completely, which can take up to 72 hours (check the grout manufacturer's instructions).
- Ensure the surface is perfectly clean and dry.
- Apply a high-quality penetrating stone sealer with a small brush or foam applicator, covering both the stones and the grout lines.
- Let the sealer soak in for 5-10 minutes, then wipe away any excess from the surface with a clean cloth. Do not let the sealer puddle and dry on the surface.
- Apply a second coat if the manufacturer recommends it.
Enjoy Your Natural Masterpiece
Congratulations! You have successfully installed a beautiful, durable, and timeless Flat Pebble Mosaic surface. You've created a feature that not only adds significant value and style to your home but also provides a daily connection to the beauty of the natural world, tapping into the aesthetic that makes River pebble mosaic so sought after. By choosing a quality product from a trusted pebble mosaic manufacturer in India, you've made an investment in your home's beauty and value.
To keep your new surface looking its best, clean it with pH-neutral stone cleaners and be sure to reseal it every 1-2 years, especially in high-use wet areas.
Ready to start your own transformation? Explore Jagson India's stunning collection of Level Pebble Mosaic and Sliced Pebble Mosaic tiles and find the perfect stone for your project today!
 Call Us
Email Us
Download Our Catalog
Call Us
Email Us
Download Our Catalog